Saturday, 15 October 2011
Introduction
In this blog, I will show how me and my team produced an idea for a digital environment project. For the first stage, we all had to do brainstorming, (quite a bit of thunder some of the time) just sketching and writing random ideas on a piece of paper until I decided to use an idea that was developed over the summer break. The story plot was about a marine biologist who took his eleven year old son on a journey in a submersible pod for deep sea excavation. Here is the progress that we have made over the pre-production stage.
Friday, 14 October 2011
Concept Artwork/ Story Development
Of course to get started on making an idea into reality, you have to put it down on paper, so to speak or type it on a computer. So got around to developing the storyline and concepts for the setting of the story. Originally, I worked on this idea over the summer for I was going to produce an illustrated novel of the story but I decided it would quite a good idea for an animation so I chose this idea for the project. Below is the brief for the main story idea.
Here is a series of images/ illustrations that I produced to visualise the setting and theme of the environments that may be relevant to the story plot. Some of these images are actually illustrations for the unfinished novel of the story. Most of the images hand-drawn, scanned and were coloured and textured using Adobe Photoshop and Microsoft Paint.


Working Title – A Deep Sea Encounter
Synopsis - A marine biologist and his eleven-year-old son embark on a journey of discovery in a submersible pod in the deep sea where they encounter a strange creature unlike anything they’ve ever seen before.
Plot - A marine biologist, Dr John Brantwood, and his son, Andrew, go on a journey in a submersible pod to the bottom of the sea, miles below the surface to discover any creatures that they have not seen before. Upon discovering an unknown cave that is filled with bioluminescent plant life, their pod accidentally loses power through physical damage. Stranded in a cave and unable to call for help and a certain amount of oxygen left, the boy discovers an unknown creature: a female looking humanoid sea creature with bioluminescence. Upon encounter, the two develop a bond and the fish girl summons a group of creatures that gather to get the pod out of the cave and they produce enough light to attract the attention of a rescue team who has come to retrieve the pod and the passengers after the system powered down.
Time – 1990s, daytime, summer.
Characters – John Brantwood, a marine biologist who specializes in deep-sea excavation. He is hardworking but he attempts to spend as much time as he can with his son.
Andrew Brantwood – John’s eleven-year-old son who has isolated himself from other children ever since his mother left. He has a thirst for knowledge, especially in marine life having been inspired by his father.
The Deep Sea Angel – an unknown bioluminescent creature that shows a level of intelligence when she summons some of her kind to assist the humans after their pod is damaged.
Theme – Discovery, dark, mysterious, alien like, adventure. Light to dark.
Below are a series of images of concept art/sketches/illustrations that show the artistic style and setting of the environments that will be involved with the storyline. Most of these images are based on reference and research and involve a mixture of digital paintings and textured hand drawings coloured in Photoshop.
ORIGINAL STORYBOARD IDEAS
Once we had confirmed the time period for production, we had decided to turn this idea into a short animated trailer. Below are a few scanned images of storyboards I produced that contain shot which we may possibly use for the final version of the trailer.


FINAL STORYBOARDS
The storyboards images below are for the final version of the animated trailer that we will be producing, although there may be a few minor changes we will make along the way, this is the storyline in the order we will be sticking to. Composed of earlier sketches and other images combined, including a few from the animatic one of my team members produced earlier on.


ILLUSTRAIONS/ DESIGNSORIGINAL STORYBOARD IDEAS
Once we had confirmed the time period for production, we had decided to turn this idea into a short animated trailer. Below are a few scanned images of storyboards I produced that contain shot which we may possibly use for the final version of the trailer.


FINAL STORYBOARDS
The storyboards images below are for the final version of the animated trailer that we will be producing, although there may be a few minor changes we will make along the way, this is the storyline in the order we will be sticking to. Composed of earlier sketches and other images combined, including a few from the animatic one of my team members produced earlier on.


Here is a series of images/ illustrations that I produced to visualise the setting and theme of the environments that may be relevant to the story plot. Some of these images are actually illustrations for the unfinished novel of the story. Most of the images hand-drawn, scanned and were coloured and textured using Adobe Photoshop and Microsoft Paint.

A piece of concept artwork, reflecting on the style and setting of the story. Always wanted to have a low angle shot of a vehicle descending through water so I came up with this image. This image is completely computer generated as the submersible pod shown was created using a 3D software known as Truespace761, it's not anywhere near as advanced as Autodesk Maya but it's really easy to use, especially for modelling.
 |
| Original illustration of the submersible pod, travelling through a narrow tunnel that contain bioluminescent plant life. Once again, the pod was CGI but the tunnel and the plants were hand drawn. |
 |
| Another image in the tunnel where the pod crashes into one side of the tunnel. |
 |
| A rough image of a posterized CGI version of the Pod, complete with lens flares and lighting, which was once again achieved in Photoshop. |
 |
| Another illustration, showing the damage the pod suffers in the original storyline. |
 |
More concept art. This is the "rescue attempt" illustration, where the bioluminescent creatures, which we've named "jelly maids" rescue the stranded pod and carry it out of the tunnel. Once again did low lighting and glow effects while using a brush that creates sparkling particles to surround the area. |

Illustration that shows the group of jelly maids surrounding the damaged yet rescued pod.
 |
Design of an anglerfish, one of possible sea animals that will be seen in the final version of the animation. A possible reference for an anglerfish model. |
 |
Original design of "submersible pod" vehicle, in blueprint mode. Already developed this during the summer break so I thought this would be a good opportunity to use the CGI model of the submersible pod. |
 |
| Another blueprint version of the vehicle from different angles. |
 |
| Original pencil illustration of the cave scene before it was coloured and textured in Photoshop. |
 |
A digital painting/hand drawn sketch that shows an entrance to a large cave. Another possible piece of environment to use in the setting of the story. |
 |
Digital painting of a decaying shipwreck on the ocean floor. Another idea for a piece of environment. |
 |
| Design for a bioluminescent species of jellyfish. Produced this after looking up research on the creature. |
 |
| Original sketch design of a deep sea creature that the main characters will interact with during their excavation. |
 |
| Another pencil drawing of the "jelly maid", showing her observing through pod window on the outside. |
More on this as it develops.
Wednesday, 12 October 2011
Environment Development
Once the concept work and designs have been produced and settled on, we began work on polygonal modelling and the building of several environments that are involved in the story plot. Below are a series of images showing the progress and some experimentation parts that I produced.
Seabed Example
Since the sea and seabed is involved with story, through some research I constructed a simple landscape of a sea floor to determine who we would have the environment appear in the final version.
Sea Port
As a submersible vehicle is to be lowered in the water, we needed a location in which it can be placed so that's where I decided to develop and construct a platform that was based on several construction sites and a crane on a boat that I observed on the River Thames.

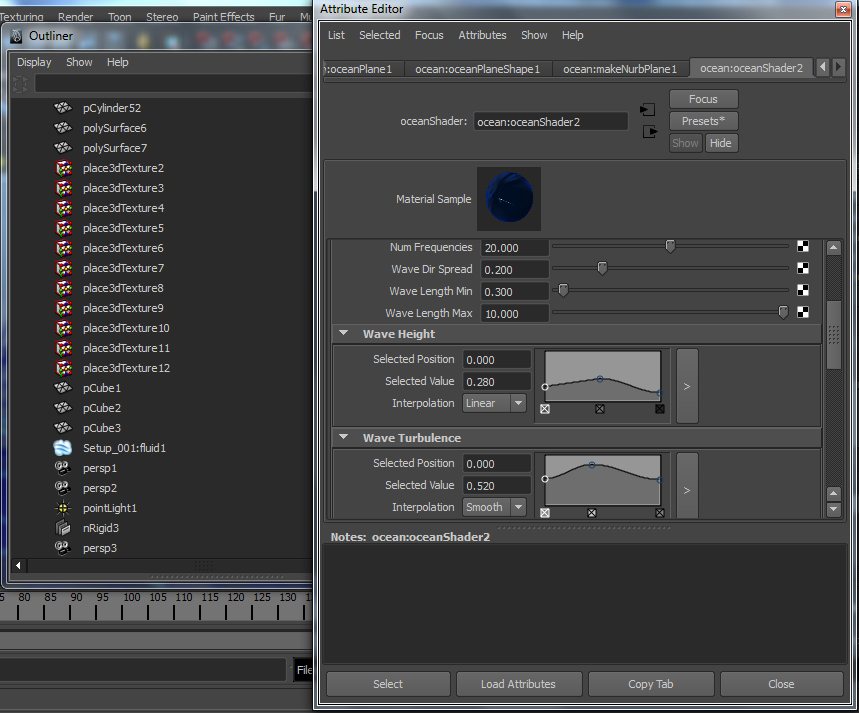
The ocean was achieved using a fluid simulation that imitated an ocean, depending on how you set the controls of frequency, turbulence, wave width and shading, as partly shown in the image below.


Seabed Example
Since the sea and seabed is involved with story, through some research I constructed a simple landscape of a sea floor to determine who we would have the environment appear in the final version.
 |
Here is a screenshot of an experimental seabed using a NURBS plane and Paint Effects. Actually, I started out with a polygonal plane, then I used the sculpt tool to alter the plane in several places to make the surface bumpy. Then I added subdivision surfaces to smooth the mesh out so there were no sharp edges and then I converted it into a NURBS plane. After that was done, the Paint Effects tool was used to produce several reef like plants that would sway and move as if they were really underwater and that was accomplished by setting the Turbulence Mode to World Displacement in Template Brush Settings. The same technique was applied using hair like brushes. |
 |
This is the rendered shot of the same seabed but using a lighting technique. I produced a spot light to use in this scene because since this is set thousands feet below sea level, there would very little to no sunlight so all there would be is a spot light to see through this environment. |
Sea Port
As a submersible vehicle is to be lowered in the water, we needed a location in which it can be placed so that's where I decided to develop and construct a platform that was based on several construction sites and a crane on a boat that I observed on the River Thames.
 |
The "sea port" in progress. The main platform and a crane has been produced for this scene using a combination of duplicated polygonal cubes and cylinders. The girder of the crane is composed only of cylinders combined and then construction history is deleted to prevent certain errors and complications in the program. |
 |
The upgraded sea port in smooth shaded/wireframe mode. Some parts of the model have been combined while others that require movement are parented together. Other models like the bridge and the small building had been constructed in another scene file and imported into the main scene. |

A mental ray rendered shot of the sea port with an ocean shader and physical sun and sky mode added. Simple texturing has been applied but may move on to UV texture editing at a later date.
 |
| Another rendered frame of a high angle shot of the sea platform. |

In the rendered image above, clouds can be seen. The clouds were achieved by using a 3D fluid container node in the software, by changing the colour, frequency and density of the fluid simuation, I was able to produce realistic looking clouds that even moved if I wished to.
Below is a shot that was developed to show more of the environment but was not used in the final version of the movie.
Tuesday, 11 October 2011
Production - Submersible Pod
The submersible pod is of course one of the major props in the storyline. As I may have mentioned earlier, this is one model that was not built in Maya, I actually built it from scratch in another 3D software program called Truespace, which is very easy to use when it comes to modelling. Not too sure about the rigging and animating systems so I just used the program for modelling this. Then when I acquired Maya, I was able to convert the file into an OBJ format that the software would accept.
 |
| The "submersible pod" in wire frame mode. |
I basically modelled this object using the same techniques that would be used in Maya, except I didn't use the mirror geometry mode for this due to certain complications with the program. Every single piece of the pod was constructed individually; the oxygen tanks, searchlight, pipes, etc. Then when all the pieces were put in place as desired, I managed to combine them all into one object, though before I did, I applied a different material state to each part so even though the entire object was combined I would still be able to manipulate the colours and texture of the parts later on.
 |
| The pod in smooth shaded mode, converted into proper OBJ format and ready for texturing. |

Since each material asset was assigned to each part of the object, I didn't have to worry too much about UV texture editing. Not really my job for the project anyway, but I decided to have a go at it at some point since the more you learn, the better prepared you are the future. For now, I just assigned new material to each part of the pod using lambets and phongs. Then I attempted to alter the colour and texture for each one through the Hypershade box and the Attributes Editor. As the pod is used for underwater excavations in the story, it has to look worn, well used and affected by water so I went through some different bump maps and colours to make it look kind of rusty and dented in some areas yet not too old and shiny in some places, like creating a texture that imitated waterproof paint and varnish. I achieved this by assigning a phong material certain parts, then altered the diffuse, specular colour and reflectivity modes to make it less clean and reflective. And then I assigned a new colour and bump map to the material by applying a 3D texture and then changing the colours and bump value to make it look just right.

After applying textures to the object, I created some spotlights and point lights to be used for the searchlights on the vehicle. Although instead of copying and pasting the same lights for each searchlight, I suppose I could have duplicated them just in case there was any error that originated from the procedure.
 |
| A rendered mental ray image of the submersible pod, complete with texture and indirect lighting; i.e, the sunlight and shadow. |
 |
| Side view of the pod against a basic background. |
 |
A close up of the pod. Notice how the surfaces of the oxygen tanks are uneven due to the bump mapping. Decided to use a crater bump map with this, along with different shades of colour, especially with the main body sa I wanted to give it a rusty kind of look while still remaining slightly shiny in some places. |
Below is a Quicktime clip of a turntable movie I produced. Switched to mental ray mode for rendering and rendered each frame of the scene in BMP files before importing them into After Effects and converting them into a movie file through an image sequence.
After a few more modifications and alterations to the texturing, the pod object is now complete and ready to be used for animation.
Monday, 10 October 2011
Camera Shots & Rendering
Below are a few of the shots that I produced for the project. The rest of the scenes that were also used were produced by other members of the group.
Low Angle Shot
This here is a low angle shot of the pod being lowered into the water by a crane. With both the sea platform and the submersible pod imported together, I started on animating the crane and the pod, with a rope in between them. The rope was created using a polygonal cylinder and applied a ncloth asset, making look more like a metal cord.
 |
| Smooth shaded preview of the shot. The rope object is selected as I set the tools to make move more like rope as the pod moves downwards and the crane rotates. |
 |
| A rendered image of the shot with the lighting and texturing complete. |
Above is a Quicktime clip of the final shot showing the pod descending towards the ocean off screen.
High Angle Shot
 |
| This smooth shaded preview shot shows the render settings where I intended to produce image files from each frame in the scene. Although we mainly used TIFF files, I sometimes used BMP format as it was what I'm used to. |
 |
Once the images were rendered, they were imported into After Effects to convert them into an image sequence and to be composited, changing the brightness, contrast and colour range if neccesary.
 |
| Rendered mental ray image of the shot, with phsyical lighting and ocean shader in the background. |
Quicktime clip of the high angle shot.
Rendering
Once the scenes were done, modelling, texturing and lighting, we finished by rendering them to be used in the trailer. We accomplsihed this by using certain techniques which proved beneficial.

Some of the scenes that were done were rendered using passes, which we learnt about in tutorials. We only used certain passes which would render a certain layer of the scene and put them into images, which would then be composited together later in After Effects.

Most of the scenes that were produced were rendered using a render farm, which was really helpful as it took less time to completely render every frame of a particular scene and more than one at a time, ones that would normally take hours to render. Was accomplished by submitting a job file, selecting the processes and the number of frames to render, once we linked the scene, the sub processes worked on each frame based the original render settings in the scene file.
Sunday, 9 October 2011
Conclusion
Below is the link to the final movie clip.
FINAL DEEP SEA - YouTube
All in all, although I was project leader for the group, I too learnt a great deal more about many aspects in production throughout the project, especially modelling and texturing in Maya. The roles of concept design and modelling were originally assigned to me, although I did perform a few other roles when needed such as animating and rendering. Although I may need to practice my skills more in the subject of modelling and building from reference images as the characters' geometry and structure could have been improved during the modelling stage but the environments were really fun to build and texture, despite some technical difficulties. The project went really well, the other members of the group all carried out their roles successfully in the end, although one member did temporarily fall back but made up for it by producing good VFX that we used. Hope to produce more great and even better work in the future.
Subscribe to:
Comments (Atom)